How I got my temporary residence permit in Norway (in 2015)
- By Robyn Lee
- Mar 20, 2018
- Comments
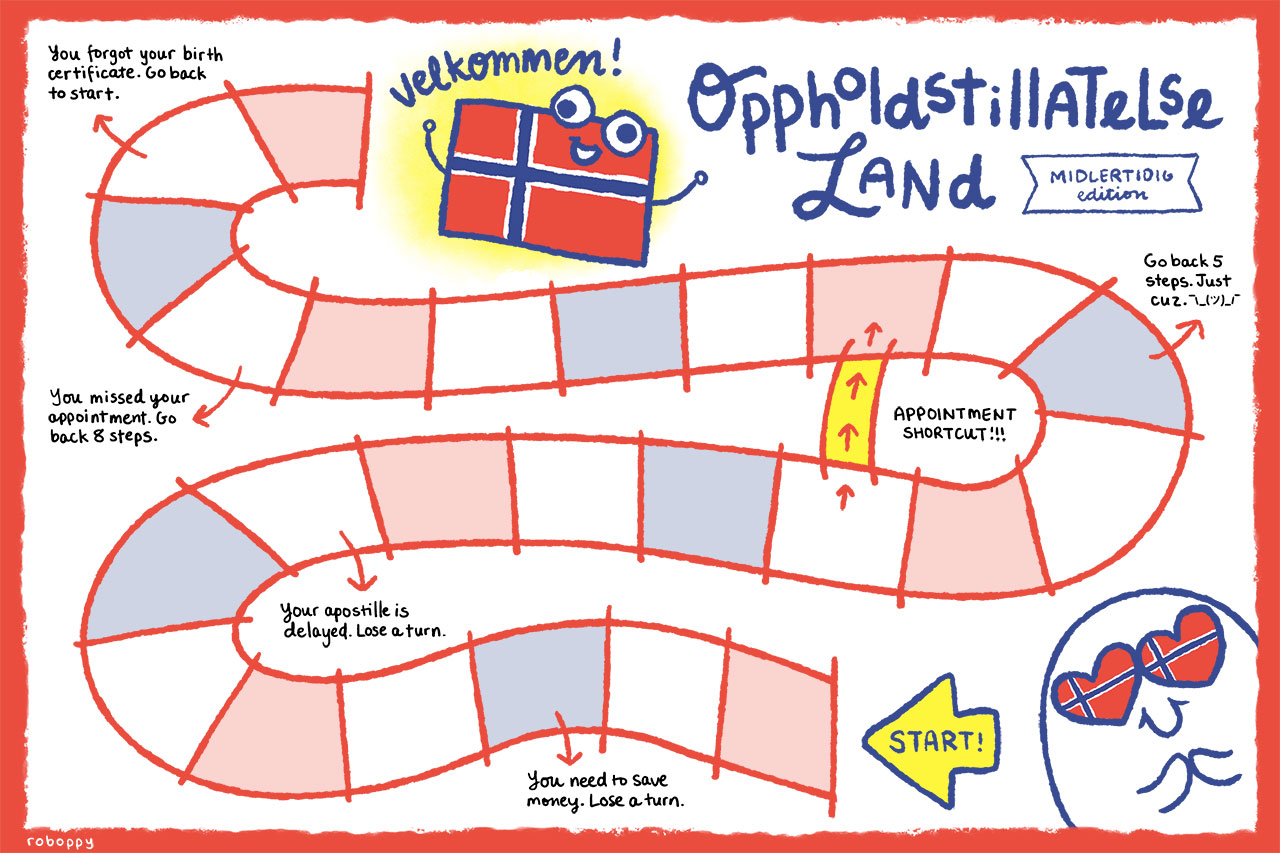
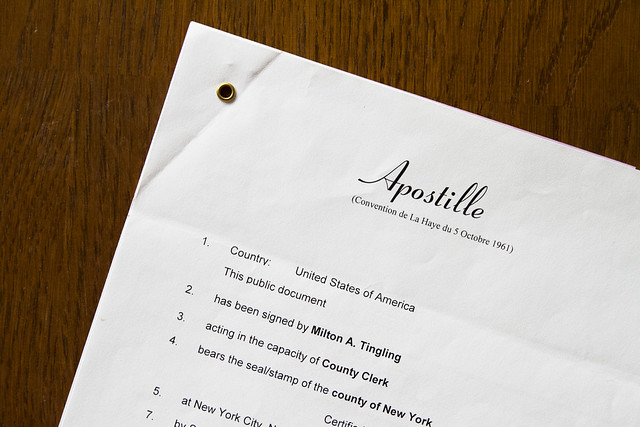
- A fun game for the whole family, said no one. Click to enlarge!
When Kåre and I had to decide whether I would move to Norway or he would move to the US after we got married, the discussion went a little something like this:
Me: You have a job, and a car, and an apartment that you own and aren't renting from a landlord you've never met before. I've got...[counts on fingers]...none of the above.
Him: Yeah....
Me: And Norway will give me access to affordable health care and medication in exchange for being a living human who pays taxes?
Him: Yeah...
Me: And applying for residency is a fairly straightforward process?
Him: I think so.
Me: And you think I'll be able to find a job at some point?
Him: ...Yeah...
Me: Cool. NORWAY, HERE I COME.
The next time I get stuck in a loop of indecision while staring at a menu of pizza toppings, I should remind myself that I spent less time figuring out which country I wanted to live in for, possibly, the rest of my life.
In mid-October of 2015, I moved to Norway. A few weeks later, I started my application for a temporary residence permit (midlertidig oppholdstillatelse), the "starter" permit that can eventually lead to a permanent residence permit (after three years) or citizenship (after seven years). By Christmas the following month, my application was approved. Just as Kåre and I had hoped for, applying for my residence permit was fairly simple and went much faster than we thought it would. Although my experience as an American married to a fully employed Norwegian citizen may not be the norm—I feel like it's a best-case scenario—I'll describe the process I went through for those who are interested in moving to Norway or are curious about the process.
For those who are actually planning on moving to Norway and aren't just reading this post for fun, please read the rest of this paragraph in BIG, SCREAMING, FIREY LETTERS: Although I've tried to make my post as informative and accurate as my memory and Googling skills allow, I am not an expert about Norwegian immigration regulations (or anything else). This is not an all-encompassing guide to getting a residence permit in Norway. Do not use my post as your main source of information. You need to look up your requirements on udi.no and research accordingly. Even if your situation is the same as mine—you're a US citizen moving to Norway as the spouse of a Norwegian citizen—my experience from 2015 will not be exactly the same as yours. Immigration requirements can be changed at any time, sometimes in small ways, sometimes in "holy shizz wtf" ways.
But don't feel intimidated! As long as you do your research, you should be fine.
Table of contents (aka this post is too long)
- Find out if you can apply from Norway or if you have to do it in your home country
- Get a list of your application requirements
- Find out how long it will (potentially) take to process your application
- Get apostilles for your vital documents before you move
- Submit the online application and book an ment at your closest immigration office in Norway
- Bring your required documents to the immigration office
- Wait for a reply and potential follow-up questions
- Go back to the immigration office to make your temporary residence card
Find out if you can apply from Norway or if you have to do it in your home country
Depending on your citizenship and the reason you're applying for a residence permit, you may be able to apply in Norway. Otherwise you'll probably have to apply from your home country and stay there until you get a reply. Figuring this out is a good place to start so you can get an idea when you can move to Norway and whether you'll be stuck in your home country or Norway as you wait for your application to be processed.
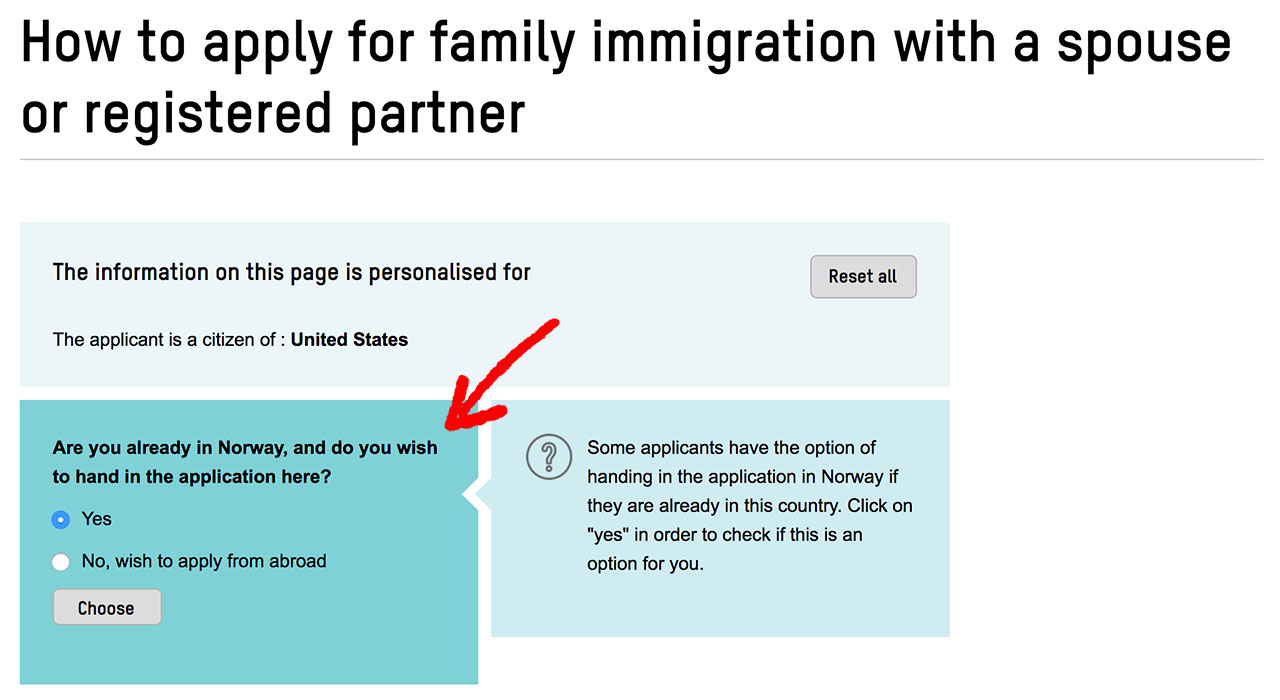
- Screenshot from udi.no.
To find out what route you can take, head to Udi.no, the website for the Norwegian Directorate of Immigration (Utlendingsdirektoratet). You can either check out the Q&A section of your reason for applying or go through UDI's application wizard, until you get to the part where it asks where you wish to hand in your application. The wizard will tell you whether or not you can do it in Norway. Depending on where you're from, you may need a certain kind of permit, visa, or other qualifications to apply in Norway.
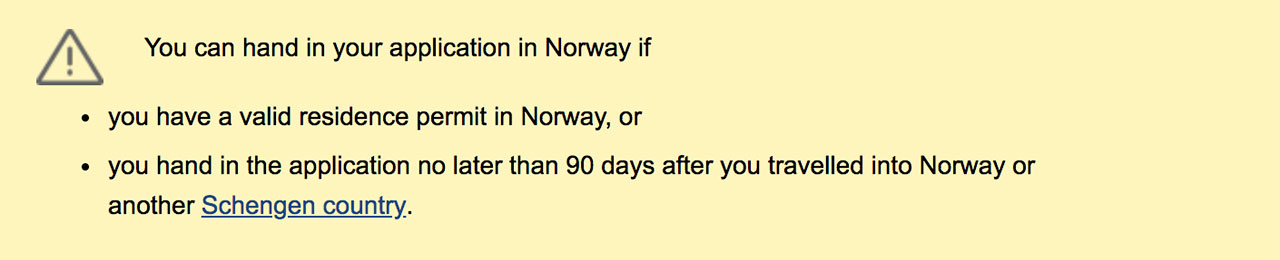
- Screenshot from udi.no.
...Or none of the above. In my situation, my only requirement for applying in Norway was that I do it within 90 days of my arrival (that is, the maximum length of stay as a visa-free tourist from the US). So that's what I did.
Because I submitted my application in Norway, most of the information in this post pertains to the process of submitting an application in Norway. If you need to submit your application from your home country, you'll have to look up the information that pertains to your situation.
Get a list of your application requirements
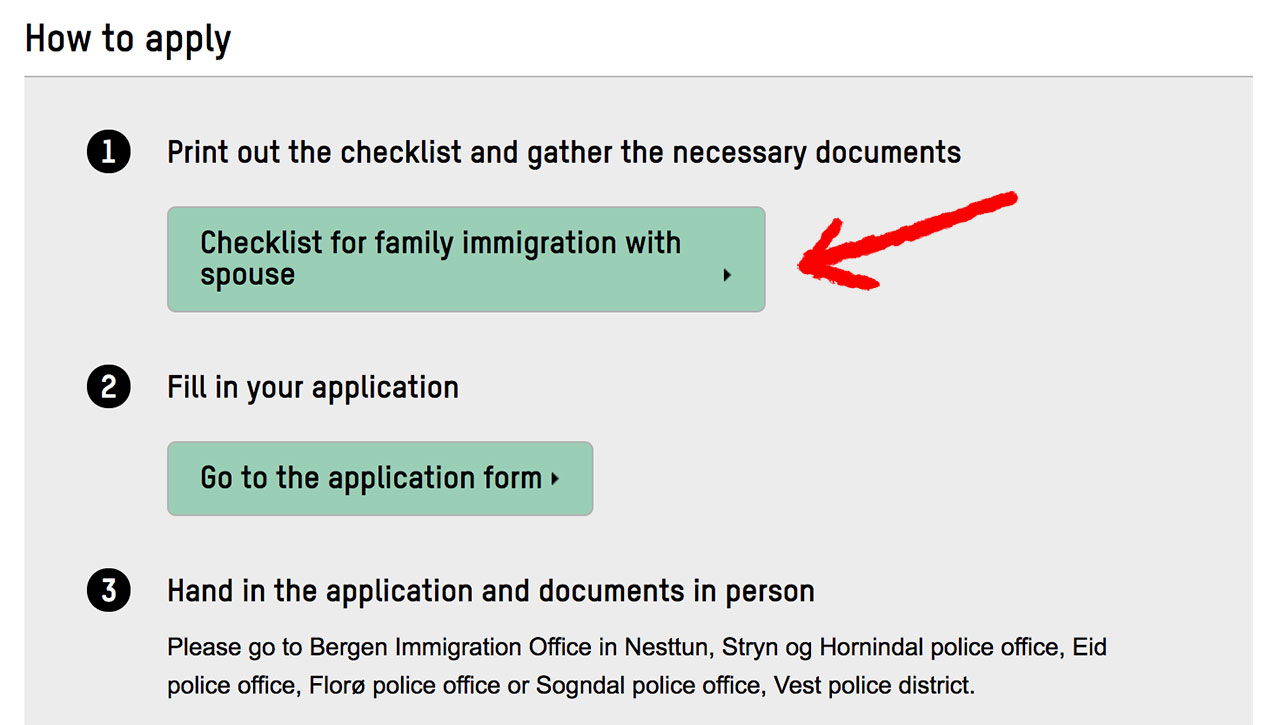
- Screenshot from udi.no.
To find out your requirements for getting a temporary residence permit, go to UDI's Want to apply page and fill in your information. At the end of the application wizard, you'll get a link to a checklist of requirements tailored to your situation.
If you want to see an example of the required documents and forms for a US citizen with a Norwegian spouse (aka, me), here's the checklist. Besides standard documents like your passport, birth certificate, and marriage certificate, there are some other documents and forms you and/or your spouse need to provide, like this marriage questionnaire.
The list of requirements today looks pretty much the same as the list I got in 2015, except for one thing at the bottom:
"You must also bring copies of all the documents. The copies must be stamped by the authorities in your country, or by a notarius publicus."
I don't remember exactly what my form said when I applied in 2015, but whatever it said, it allowed me to make certified copies (rett kopi) of my American documents in Norway. Today's requirement seems to be that you need to make notarized copies in your home country. Since I didn't have to do this, I can't give any advice about the process. Definitely check this requirement before you head to Norway. If I ended up at the immigration office with the correct original documents but the wrong copies, the next day's local newspaper might feature a photo of me over a headline like, "American woman permanently stuck in fetal position."
Check the latest application fees to make sure you can pay for all this stuff you're prepping for. Today's fee for first-time adult applicants is 10,500 NOK. When I applied in 2015, the fee was only 5,900 NOK. I'm not saying the new fee is unreasonable, but damn, that's not an inflation-matching increase. What happened in the last three years? I don't know. (But I'm guessing Norway's conservative coalition government didn't help.) Immigration regulations change frequently—always make sure you have the latest information.
If you have more questions that UDI's website doesn't answer, contact UDI. I once sent them some questions through their online form and they got back to me quite quickly. UDI also has Facebook pages where you can ask questions related to family immigration and work immigration (or read other people's questions).
On a semi-related note, if you need to get passport photos in Bergen for your application, you can do this at a photo booth on the first floor of Bergen Storsenter.
Find out how long it will (potentially) take to process your application
Once you turn in your application, you'll probably have to stay put in your home country or in Norway until you get a reply. To get an idea of how long this may take before you start your application, head to UDI's case processing times page and choose the type of application you plan on doing. As an example, UDI says a case like mine—a US citizen applying under family immigration though marriage to a Norwegian citizen—normally takes six months to process. And that's today, as of March 2018. By the time you apply, it could be shorter. I'm pretty sure the process time was longer when I applied in 2015. Due to the estimated processing time I read on UDI's website, I didn't make any plans to travel out of Norway for about a year.
But every application is different. Your actual processing time could be nothing like UDI's proposed processing times, for better or worse. In my case, it was for better. Here the rough timeline of my application process:
- Mid-October, 2015: Moved to Norway
- Early November: Submitted my temporary residence permit application online
- Early December: Went to my appointment at the immigration office to turn in necessary documents
- Late December: Permit approved!
My case was processed in less than a month. I don't know how common that timeframe is, just that it was way off UDI's estimate. Although I don't know exactly what conditions sped up my processing time, it didn't hurt that I had all the correct documents. As far as I know, having all the correct documents meant my application was processed locally in Bergen instead of sent to the central UDI office where it could get stuck in some sort of "incomplete applications" purgatory. An easy way to screw up your application is to having the wrong vital documents or apostilles.
And so comes the next important step...
Get apostilles for your vital documents before you move
The first time I went to my local immigration office to hand in my documents, my pulse didn't fully slow down to its resting rate until the clerk carefully flipped through my documents and told me I had everything in order. After I mentally sighed with enough force to deflate my brain into a raisin-esque nubbin, I asked the clerk, "How often do people not have all the right documents?"
"It happens more often than you might think," she said. "Some people come here without realizing that they're missing documents they need from their home country."
And thus comes the first step in collecting everything you need for your application: Make sure you have all the right documents from your home country before you move to Norway (if you're applying in Norway). This part of the application process almost felt more complicated than what I had to do in Norway.
In my case, that meant before I left the US, I needed to get an apostille for two documents: my marriage certificate and my birth certificate. The apostille renders those official documents valid in certain foreign countries, such as Norway. Depending on what states you were married and born in, the process of getting an apostille may or may not be fast and inexpensive. Since I got married in New York City and was born in New Jersey, I'll explain how I got the apostilles for my marriage certificate in Manhattan and my birth certificate in Trenton. I applied for the apostilles in person but they can also be obtained through the mail. (Shout-out to my mom who came along for the whole process, whether it was by car, train, or subway. THANK YOU, MOM, I LOVE YOOOUUU, pleasedon'tleavemeever.)
If you need certificates from another state, you'll have to look up the information for that state. Every state has different procedures. Even if you need the same certificates I did, check the appropriate government websites for the latest requirements in forms, IDs, payments, and more.
How to get your NYC (Manhattan) marriage certificate apostille in one day
- Thanks, Milton A. Tingling!
To get your marriage certificate apostille in Manhattan, you need to go to three offices in a certain order, paying various fees along the way with different methods of payment because, you know, the more important something is, the easier it should be to screw up getting that thing. On the bright side, the offices are all within walking distance of one another in the Financial District. Start early in the day and you'll be done in a few hours if all goes well.
Step 1: City Clerk's Office, Marriage Bureau (141 Worth Street)
Head to the City Clerk Marriage Bureau to get your marriage certificate for foreign use ($35, credit card or money order) from the Office of Records. This is not the same certificate as the one you got when you first got married. It looks almost the same but also features the signature and seal of the County Clerk's office. Now it is more acceptable in the eyes of the Norwegian government, unlike the other one, which is flat garbage.
Step 2: Supreme Court, Notary Public Desk (60 Centre Street)
You need to head to the Notary Section in the basement of the Supreme Court, room 141B, to get your marriage certificate authenticated with the City Clerk's signature ($3, cash or credit card).
This process was surprisingly fast—I didn't have to wait long in the building's security line, and getting the signature seemed to take less than a minute. I wouldn't have minded waiting a bit longer considering it was my first time in the building and the architecture is beautiful (aside from the notary public, which has the charm of the DMV), but it's a good thing it was fast because the next and last step took the longest.
Step 3: Department of State, Apostille/Certification Office (123 William Street)
Finally, you can get that damn apostille. Take all your stamped shizz and your apostille form to the 2nd floor of the Department of State at the Apostille/Certification office to get the authentication of the County Clerk's signature and the attachment of the apostille ($10, money order or check). After waiting in line and handing in all your documents, you'll want to park yourself in one of the provided seats as you wait to get your apostilled certificate. (This is way more like the DMV than the notary section.) I waited close to an hour.
How to get your NJ birth certificate apostille in more than one day

- New Jersey state seal on my birth certificate. Now I can prove I was super duper born in New Jersey.
Compared to other states, New Jersey appears to reach an impressive level of incompetence and/or greed when it comes to getting apostilles. I don't know how else to explain why NJ is the only state I could find where you have to pay a ridiculous amount to get a same-day apostille. (But if your state does this too, let me know! Although I'd like to look up the info for every state*, I also want to finish writing this post before the first Martian Olympics.) In other states I looked up, if you bring your form to the office you can get your apostille processed the same day, like what I did to get my marriage certificate apostille in NYC. Otherwise, you can get the apostille through the mail, which tends to be fairly quick and priced the same.
* I didn't look up the apostille information of every state, but I looked up enough to have a favorite apostille website: Alaska! You win! Your page was so epically thorough and amicable that I felt compelled to read the whole thing! ...Why, yes, I don't get out enough.
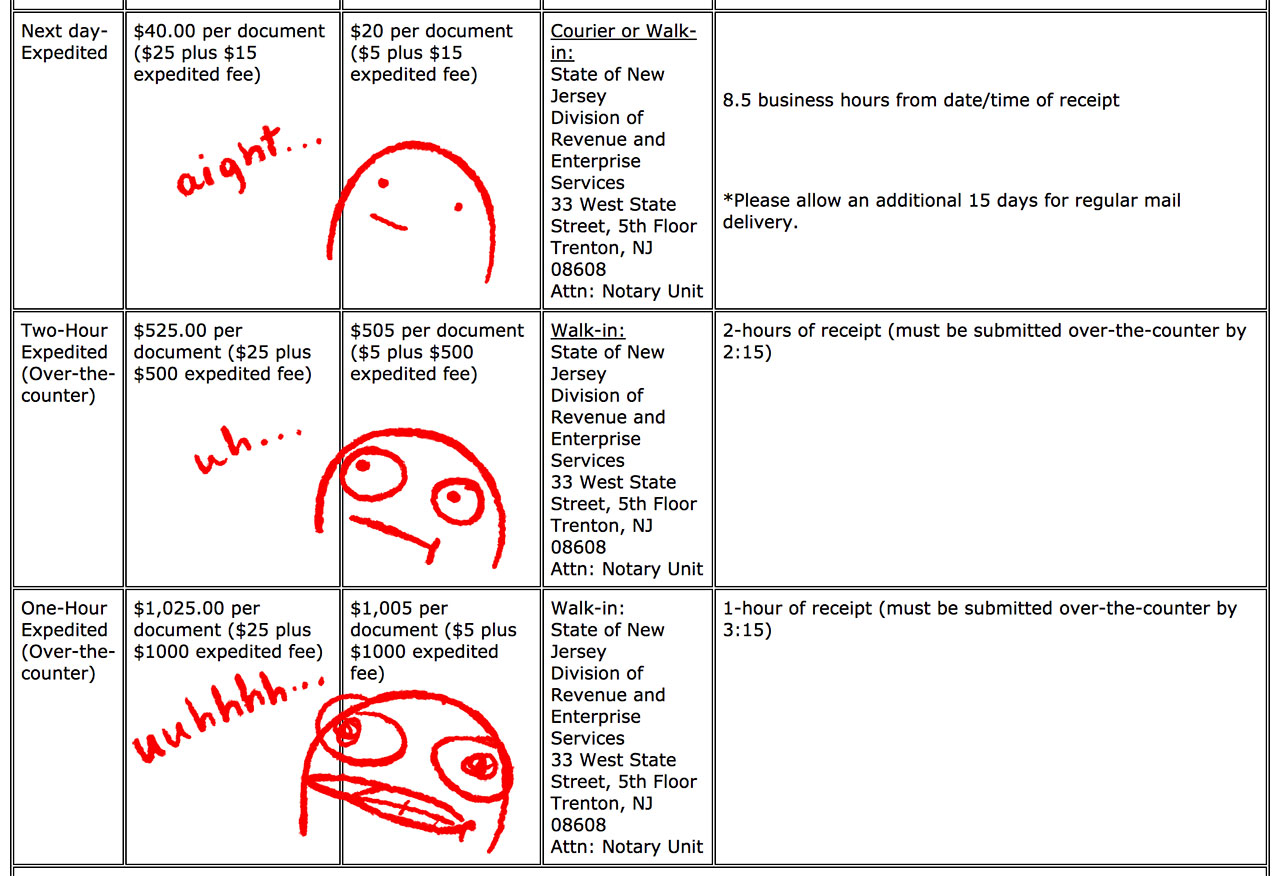
- Screenshot from state.nj.us/treasury/revenue/apostilles.shtml.
But NJ is special. UP TO ONE THOUSAND AND TWENTY-FIVE DOLLARS SPECIAL. That's the price if you want your apostille in an hour. If you can bear the agony of waiting two hours, the price is a mere $525. For real, check out the full price list here.
It may be unfair to compare these prices to other states considering I didn't find 1- or 2-hour processing offered in the other states I checked, but I think that's because most states wouldn't see the need. Outside of NJ, there's some kind of mutual understanding that a few hours is a reasonable amount of time to process an apostille, no exorbitant fee required.
Thankfully, there is an affordable fast-but-not-same-day option: next-day expedited for $40. I chose this instead of the cheapest $20 option because I waited way too long to start the process of getting my birth certificate apostille and couldn't risk the regular processing time of up to 20 days. "Next-day expedited" means the document will be processed within 8.5 business hours. That's well worth the extra $20 to avoid potentially waiting 20 days. I brought a pre-paid FedEx envelope to the apostille office to make things snappier.
Up until I got to the Division of Revenue and Enterprise Services to turn in my apostille application and birth certificate, my confidence in the system was a bit shaky. But when I saw the office, I changed my tune. "This looks like a trustworthy place with skilled employees who will get my application done far sooner than 8.5 business hours," I thought.
Shortly after I handed my documents to the clerk, all the lights in the room turned off. The building had been hit by a power outage. My timing was perfect. Or very close to not perfect. After waiting around for a while with other employees, we were ushered down the stairs to exit the building. Unlike the employees, I WAS FREE. WOOHOO.
But wait, there's more. In early November, 2015, a few weeks after I had moved to Norway, my mom received a notice in the mail that there had been a burglary at the Office of Vital Statistics and Registry, the office where I ordered my birth certificate. The notice was sent to those of us who had recently made a payment to the office, informing us to monitor our bank accounts and call the police if our checks cleared.
I won't tell you what happened to my check. I'll just say that I may or may not have had to call the police, and I may or may not have saved $25.
(I don't mean to be hard on the good people doing their damndest to keep New Jersey running despite the obstacles in their way. All the employees I encountered were nice and professional, and there was hardly any wait for service at either office. I can't complain—I got my birth certificate and apostille in a timely manner. And I'm going to tell myself that power outages and burglaries build character.)
Step 1: Office of Vital Statistics and Registry (140 East Front Street, Trenton, NJ 08608)
Head to the Office of Vital Statistics and Registry at the Department of Health to get your certified copy of your birth certificate ($25, check or money order). You cannot get this at the office of vital records in the county you were born (which I know because I tried); you have to get it from the Trenton office.
Step 2: Division of Revenue and Enterprise Services (33 West State Street, 5th Floor, Trenton, NJ 08608)
Bring your birth certificate, apostille form, and prepaid envelope of your choice to the Division of Revenue and Enterprise Services to get your apostille ($25-$1025, check or credit card, or maybe your first-born).
Get notarized copies of your documents, maybe?
I mentioned this rule earlier in my post. Something different with today's requirements compared to when I applied in 2015 is that you may have to make notarized copies of your marriage certificate, birth certificate, and passport in your home country. Since I didn't have to do this, I can't say with complete certainty that this is what you have to do, nor can I say anything about the process.
Got all your apostilles and vital documents in order? Woohoo! Time to move to Norway and do all the other stuff!
Submit the online application and book an appointment at your closest immigration office
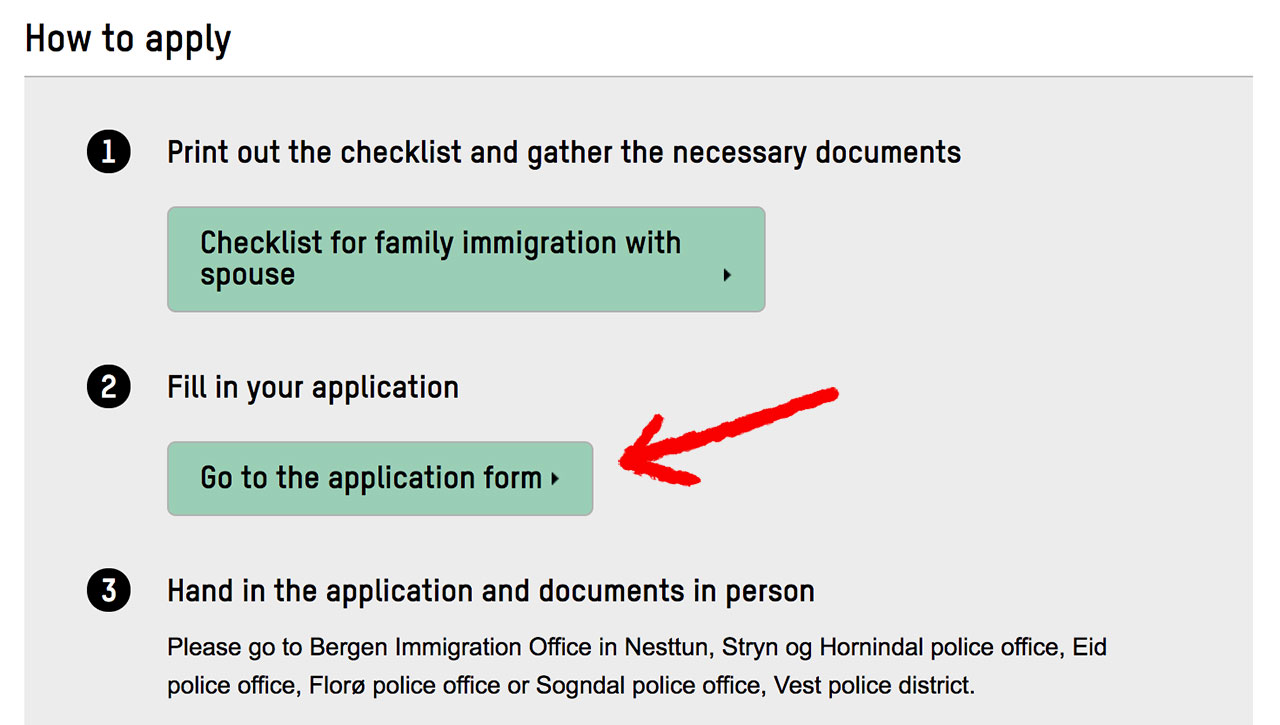
- Screenshot from udi.no.
At the end of UDI's application wizard, Step 2 will direct you to UDI's Application Portal to fill out a form and book an appointment. Fill out the online form and book your appointment before working on your other forms and documents. The next available appointment may be weeks away, so it's better to get on this earlier than later. For instance, the first time I tried to booked an appointment, I had to choose an appointment date that was over a month away. If you don't see any available appointments in the booking calendar, check again the next day (and the next). This happened to me when I had to book an appointment to renew my permit.
Bring your required documents to the immigration office
UDI's website will tell you where you need to go for your appointment. If you live in Bergen like I do, you'll head to the immigration office at Nesttunbrekka 95 in Nesttun, conveniently located a short walk away from the Skjoldskiftet bybanen stop. There's no need to show up much earlier than your appointment since there will be other people waiting for their appointments before yours. I learned that lesson during my first visit, when I got to the immigration office waaaay too early. I spent the extra time waiting around nervously until a clerk took me five minutes before my scheduled time.

- Nervous sweats.
As for why I was nervous, it was a little bit due to my fear that something was wrong with my application. I think that's pretty normal, mentally flipping through all the ways your application could be rejected mere moments before facing The Powers That Be. Less normal was the main cause of my nervousness, which was that I didn't totally understand how to turn in my application. It's not like the queue to the counter was a maze lined with rusty, flame-spurting spikes, or screaming babies with cavernous lung capacities. It was worse. It was a maze only I could see. A maze...of...the....miiiind.
Before I drag you along for a ride on my crazy train, I'll summarize the experience and let you be the judge.
- Enter the immigration office through the outside doors into a small waiting room with a ticket numbering machine.
- If you're at the office for a walk-in meeting, take a slip from the ticket numbering machine and wait for your number to appear by the walk-in counter.
- If you're at the office for an appointment, do not take a ticket. Walk into the main room with the counters.
- Pick a spot to stand somewhere along the office's windows facing the counters. Wonder if the 20-something other people in the room are supposed to go before you. WONDER AS HARD AS YOU CAN.
- When a counter appears to be open, look around to see if anyone else is walking towards the counter. The clerk behind the counter won't call anyone individually. They may or may not be ready to see you. It's a secret between them and their god.
- When a bunch of heads are turned towards the counter but no one else appears to be walking to it, take a hesitant first half-step in the direction of the counter.
- Stop moving because a less hesitant person got there already.
- Wait until another counter opens up. Return to step five and repeat. UNLESS...
- ...the clerk has waited so long for a person to come up that they call out an appointment time. If they call your appointment time, go up to the counter. If they call an appointment time five to ten minutes later than your appointment time but no one else goes up to the counter, go up to the counter.
- If the clerk isn't ready to take you, go back to step 4.
You see the problem? Even though the clerks have the knowledge to call people to a counter, they don't necessarily do it, and those of us who made appointments don't necessarily know when to go to a counter. There's an unnecessary void of communication. That void is the foundation of my maze.
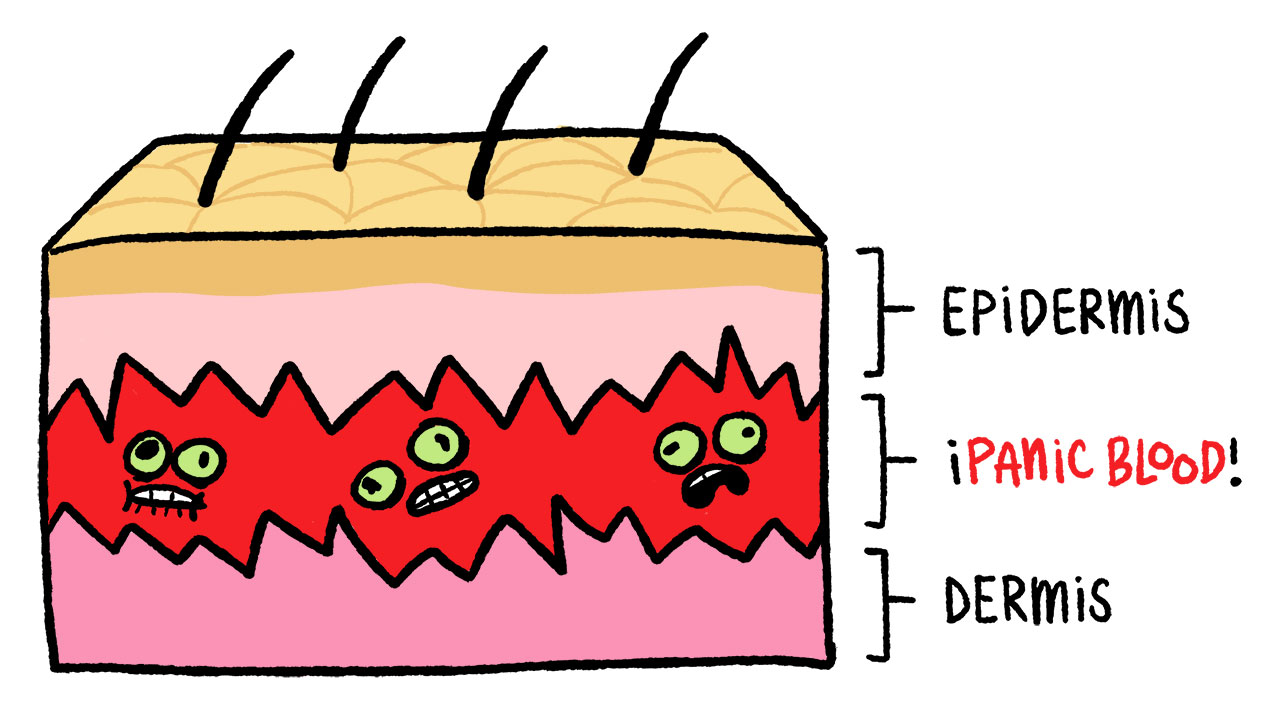
- If you ever see this diagram in a medical book, you should not use that book.
If you're a normal, reasonable person then you might be thinking, "I don't see what the problem is. Just go up to a counter when it's your appointment time." Being a normal person, your skin probably consists of a dermis overlaid with an epidermis. If you're a less normal person like me, you might have an extra, medically unrecognized layer between the dermis and epidermis I like to call "¡PANIC BLOOD!" This layer—which consists of, you guessed it, panic blood—keeps us on our toes with quivering waves of endless doubt and anxiety cycling at a rate akin to that of a hummingbird flapping its wings, more so if the hummingbird is full of panic blood.
So even though I know what time my appointment is, I'm not sure if it's my turn because I don't know who's supposed to go before whom. If by the time my appointment rolls around there are still ten people waiting who got there before me, I'm going to wonder, "Are those people supposed to go first?" I think most people would try to avoid cutting in front of someone else. Hence the doubt and anxiety.
Yup, I've definitely wasted too much of my life thinking about this. Through my cathartic keyboard smashing, I've realized that the problem is so trivial that the immigration office probably doesn't think it's a problem. It's not like there's chaos or angry mobs. Everyone gets their meeting in the end. And I'm not against the clerks—I've always found them cordial and efficient. It's certainly not their fault that they don't know about my ¡PANIC BLOOD! layer. I'm just against the office's weird system.
One "improvement" I noticed during my most recent visit a few months ago is that small red and green lights have been installed above each counter to designate whether the counter is open or not. I'm not sure the lights were being used in a helpful way—maybe the lights were so new that clerks weren't using them correctly—but I guess it's better than nothing. It at least shows that the office is aware that their system could use some work, which is both reassuring and frustrating.
...Well, when you eventually get to a counter, the process should go quickly if all your documents are in order. And if you took the Bybanen to the office, your ticket will probably still be valid by the time you leave, seeing as it's good for 90 minutes within Bergen. Hooray, a round trip for a single fare! CELEBRATE THE LITTLE THINGS. (A single fare is 37 NOK, which is close to US$5. Ima milk that fare for all it's worth.)
And now you wait.
Wait for a reply and potential follow-up questions
The only follow-up I got to my application was a request from the police station for wedding photos. And Kåre got that request, not me. I heard that couples may be asked to be interviewed, but that didn't happen with us.
In late December, a representative from the police station called Kåre to ask for our wedding photos. Kåre immediately emailed back some of our wedding photos, plus a link to our online album. The next day, Kåre received an email saying my application was approved. Within a few days, we got an official notice in the mail from the police station about my approved application. From the time I handed in my application to getting the approval was only about two weeks.
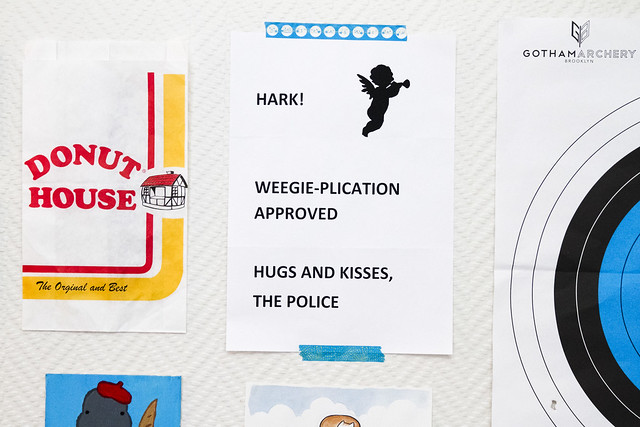
- I taped Kåre's custom-made approval notice next to a doughnut bag and above some manatee art, as one does.
And on December 24, I found out my application was approved. Since Kåre got the good news before I did, he kept the approval a secret from me until Christmas Eve, allowing him to dramatically reveal the news as a mildly cryptic Christmas gift (pictured above).
Go back to the immigration office to make your residence card
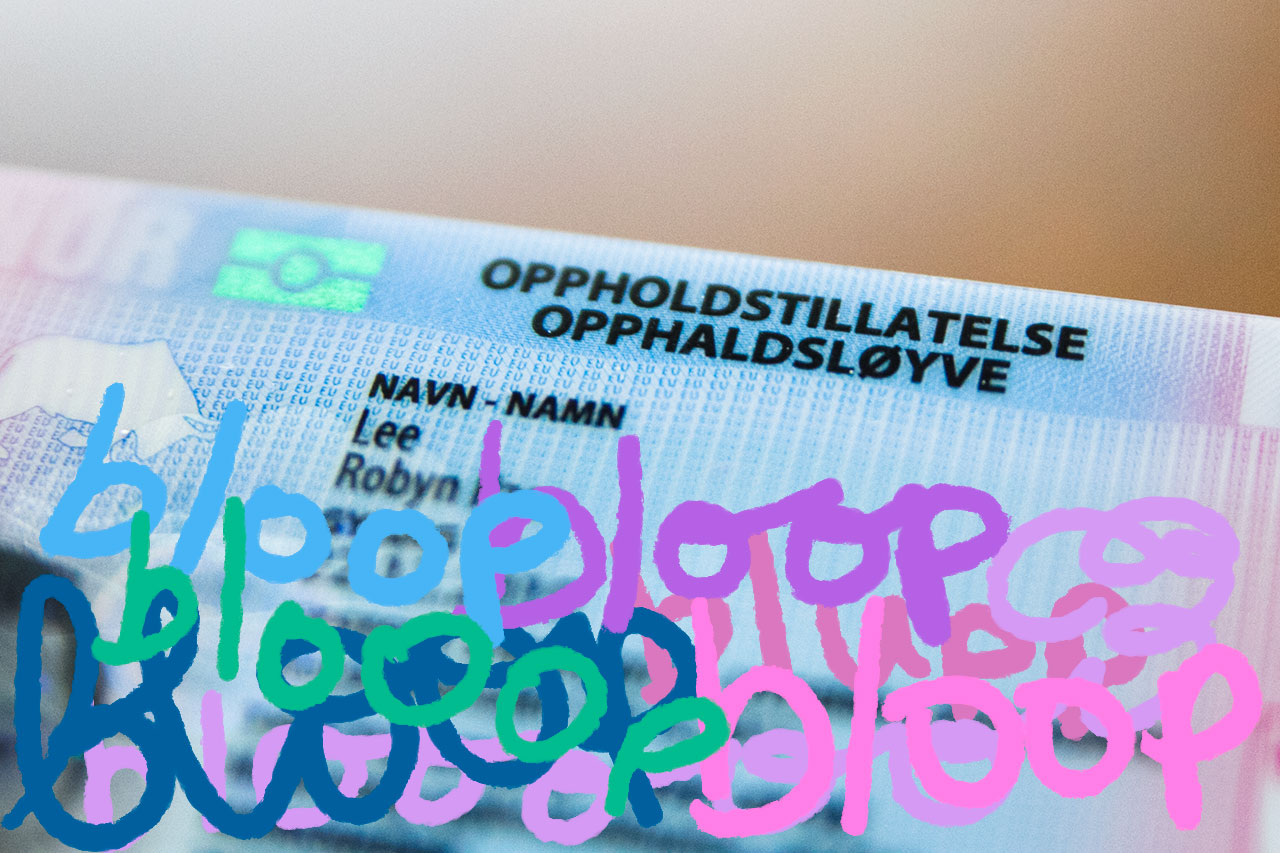
- Norwegian residence card with extra bloops.
Your permit approval will come with a notice telling you to make an appointment to get your residence card (oppholdskort). When you head back to the Immigration Office of Quiet Anxiety, you'll be instructed to use one of their card machines to record your photo, fingerprint, and signature. A few days after that, you'll get your card in the mail.
Now when leave and come back to Norway, you'll be ready when the customs peeps ask you what the hell you're doing in their fine country. So even after you triumphantly yell, "I LIVE HERE, BLAMMO!" while slamming your residence card in front of them, they'll have to let you in. Probably. To be safe, keep the yelling in your head. Don't let the voices out. Never let the voices out.
Now that you've got your residence permit, check out these other services to get the most out of your new life in Norway.
If you have any more questions about getting a Norwegian residence permit or stories to share about your experience getting a permit in another country, let me know! Leave a comment below or email me at roboppy@gmail.com.
Comments